When to Plant Clover Food Plots: Timing, Rates, and the Step-by-Step Guide to Getting It Right

Clover is the most forgiving, most productive, and most cost-effective perennial food plot planting you can put in the ground. A well-established white clover plot will feed deer from April through November, fix 80 to 200 pounds of nitrogen per acre per year into your soil, tolerate moderate deer browsing pressure without being grazed into the dirt, and persist for three to five years before it needs replanting. No annual brassica or cereal grain plot does all of that.
But clover is only forgiving if you plant it at the right time. Miss the window, and germination is spotty, weed competition buries the seedlings, and you spend a full season staring at a plot that should have been green by May. The timing question, "when to plant clover food plots," is the one I get asked more than any other in food plot management, and the answer depends on where you are, what your soil looks like, and whether you're frost seeding, spring planting, or going in late summer.
Why Clover Matters for Your Property
Clover does three things at once that no other food plot species matches. First, it feeds deer throughout the growing season, when most annual plots are either not yet planted or have not yet matured. A clover plot that greens up in April is pulling deer onto your property four months before your fall brassica plot even goes in the ground. Second, clover fixes atmospheric nitrogen through rhizobium bacteria in root nodules, building soil fertility that benefits everything you plant next to it or after it. Third, clover tolerates browsing pressure. A plot that gets hammered by deer in May comes back by July. Annuals don't do that.
For properties running a year-round habitat program, clover is the foundation layer on which everything else builds. Your fall brassicas, your cereal grains, and your summer forb blends all perform better when the soil beneath them has been built by years of clover's nitrogen fixation and root biology.
When to Plant Clover Food Plots: The Three Windows
Frost Seeding (Late February through Mid-March)
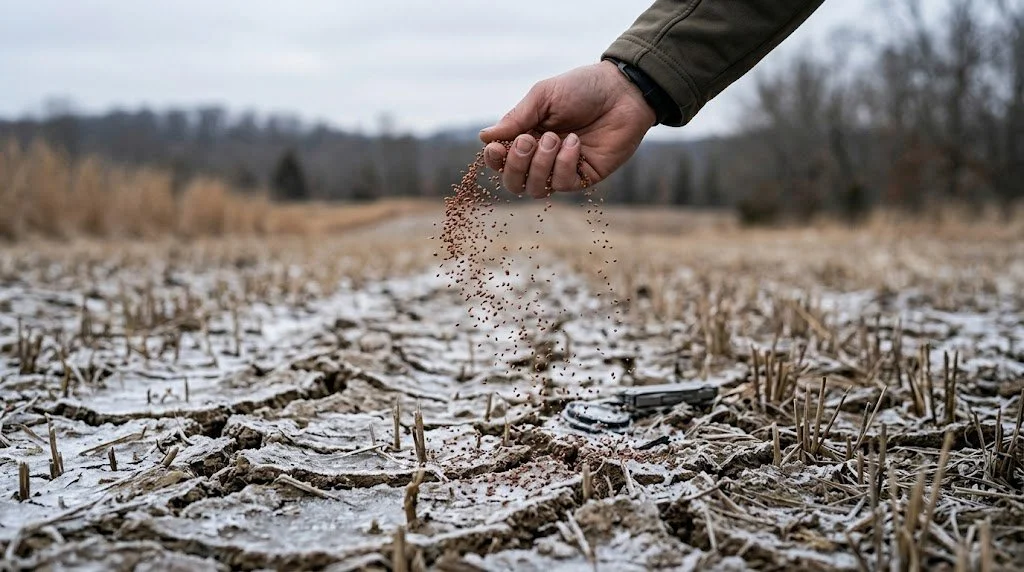
Frost seeding is the easiest and cheapest way to establish clover, and it works best in the upper Midwest and northern states where the freeze-thaw cycle in late winter works the seed into the soil surface naturally. You broadcast clover seed over existing ground (even thin grass or last year's standing stubble) in late February or early March, while the ground is still experiencing overnight freezes and daytime thaws. The freeze-thaw cycle creates tiny cracks in the soil surface that pull the seed down to the right depth without any mechanical incorporation.
Frost seeding works best on bare or thin ground where seed-to-soil contact is good. If you're seeding over thick grass or heavy thatch, the clover seed sits on top of the mat and never reaches the dirt. Mow the existing vegetation as short as possible before frost seeding, or burn it if you can. Broadcast at 4 to 6 pounds per acre for white clover, 8 to 10 pounds per acre for red clover. No dragging, no covering, no equipment beyond a hand spreader or ATV-mounted broadcaster.
Best for: Zones 3 through 6 (Michigan, Wisconsin, Minnesota, Pennsylvania, Ohio, New York, and similar latitudes). The window is roughly the last two weeks of February through mid-March, depending on your local freeze-thaw cycle.
Spring Planting (Mid-April through Late May)
Spring planting is the most common approach and offers the most control over seedbed preparation. You till or disc the ground, correct the pH, firm the seedbed, broadcast or drill the seed, and cultipack. The goal is to get clover in the ground after the risk of hard frost has passed, but early enough that the seedlings establish a strong root system before summer heat and drought stress hit.
The window varies by latitude. In southwest Michigan (Zone 6a), I target the period from the last week of April through mid-May. Further north, push it to early through mid-May. Further south (Zone 7 and below), plant in early to mid-April or shift to the late-summer window instead. Clover germinates best in soil temperatures of 50 to 65 degrees Fahrenheit. Below 50, germination is slow and spotty. Above 75, seedlings experience heat stress before their root systems are established.
Best for: All zones, but the timing window shifts with latitude. This is the right approach when you're establishing a new plot from bare ground or converting a field that needs full seedbed prep.
Late Summer Planting (Late August through Mid-September)
Late summer planting takes advantage of cooling soil temperatures, shorter days, and the fall rain cycle. In many parts of the Midwest and South, late August through mid-September is the most reliable planting window because you avoid the spring weed competition that buries young clover seedlings in a spring planting.
The trade-off is that you give up a full growing season. A late summer clover planting won't be fully established until the following spring, and deer browsing during the first fall can set back seedlings that haven't rooted deeply enough. If you plant in late August, plan to keep deer off the plot through a temporary fence or by planting a companion brassica or cereal grain in an adjacent plot that draws the browsing pressure away from the young clover.
Best for: Zones 5 through 8, and any property where spring weed pressure has killed previous spring clover attempts.
Site Selection and Soil Prep
Sunlight. Clover needs 4 to 6 hours of direct sunlight. It tolerates partial shade better than most food plot species, which makes it a good choice for smaller openings in timber. Full sun is better, but clover will produce in filtered light where brassicas and corn won't.
Drainage. Clover doesn't tolerate standing water. Avoid low spots that hold water for more than 24 hours after a rain. Slight slopes or well-drained flats are ideal.
Soil pH. This is where most clover plots fail before they start. Clover needs a soil pH of 6.0 to 7.0 to thrive. Below 6.0, the rhizobium bacteria that fix nitrogen in the root nodules don't function efficiently, and the clover grows thin and pale. Test your soil before you plant. If the pH is below 6.0, apply pelletized lime at the rate your soil test recommends (typically 1 to 2 tons per acre to raise pH by one full point on most soils). Lime takes 3 to 6 months to fully adjust pH, so apply it in the fall before a spring planting or in early spring for a late-summer planting.
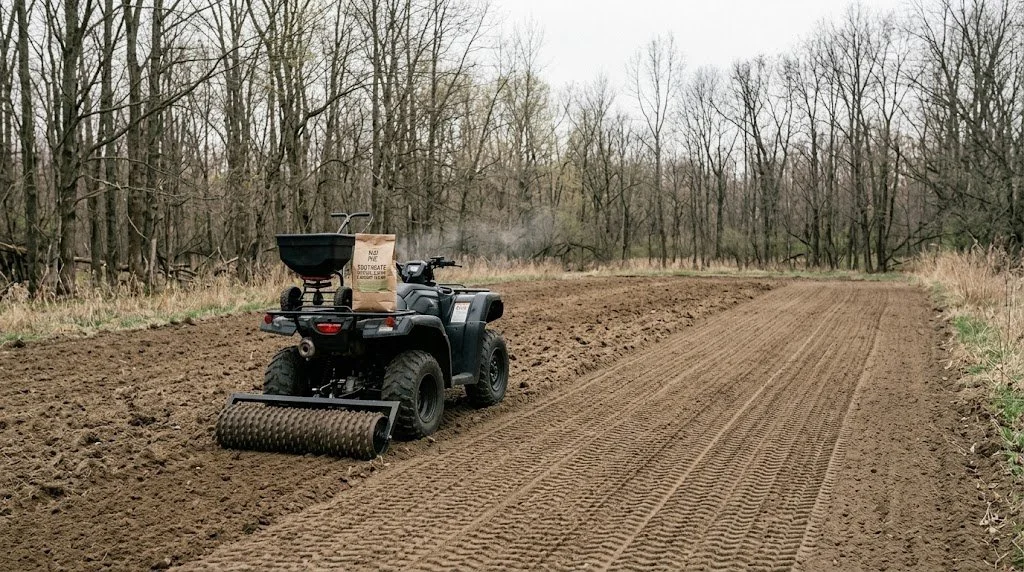
Seedbed preparation. For spring planting, till or disc to a depth of 4 to 6 inches to break up compaction and create a clean seedbed. Remove existing vegetation. Rake or drag smooth. Then firm the seedbed by cultipacking or driving over it with an ATV. You want the surface firm enough that you leave a shallow boot print, not a deep one. Clover seed is tiny and needs to be planted at a depth of 1/4 inch or less. A loose, fluffy seedbed buries the seed too deep.
Step-by-Step Planting Guide
Soil test. Pull soil samples 3 to 6 months before planting. Send to your state extension office or a private lab. Cost is usually $10 to $20 per sample.
Apply lime if needed. Spread pelletized lime at the recommended rate and work it into the top 4 to 6 inches of soil. Give it time to react before planting.
Prepare the seedbed. Till or disc to a depth of 4 to 6 inches. Remove rocks and debris. Smooth with a drag or rake. Cultipack to firm the surface.
Apply fertilizer. Clover fixes its own nitrogen, so skip the nitrogen. Apply 0-20-20 or a similar phosphorus- and potassium-based blend at 200 to 300 pounds per acre, based on your soil test results. Work it into the top 2 inches.
Inoculate the seed. If your soil has never grown clover before, coat the seed with the appropriate rhizobium inoculant before planting. Most premium clover seed comes pre-inoculated, but adding fresh inoculant at planting is cheap insurance. The inoculant contains the nitrogen-fixing bacteria that clover depends on. Without it, the clover grows but doesn't fix nitrogen and stays thin.
Broadcast or drill. Broadcast at 4 to 6 pounds per acre for white clover (Durana, Patriot, Ladino types), 8 to 10 pounds per acre for red clover, or 10 to 12 pounds per acre for a clover-chicory blend. If drilling, set the depth to a maximum of ¼ inch. Clover seed is small. Too deep and it won't germinate.
Cultipack after seeding. This is the step most people skip and the one that makes the biggest difference. Cultipacking presses the seed into firm contact with the soil surface. Good seed-to-soil contact is the single most important factor in clover germination. If you don't own a cultipacker, drive over the plot slowly with an ATV or UTV. Not as good as a cultipack roller, but better than leaving the seed sitting on loose dirt.
Wait for rain. Clover needs moisture to germinate. If you're planting in a dry window, wait. A week of patience for rain is better than broadcasting into dust.
Establishment Timeline
Year 1. Clover germinates in 7 to 14 days under good conditions. Seedlings are small and fragile for the first 6 to 8 weeks. Weed competition is your biggest enemy. A spring-planted plot should show a visible green carpet by early June. By late summer, the clover stand should be thick enough to shade out most annual weeds. Don't mow until the clover reaches 8 to 10 inches. Then mow to 4 inches to encourage lateral growth and thicken the stand.
Year 2. An established clover plot hits its stride in the second year. The root system is deep, the nitrogen fixation is running, and the stand is thick enough to outcompete most annual weeds without intervention. Deer use picks up as the plot produces higher-protein forage than the surrounding browse. Mow 2 to 3 times during the growing season to keep the clover at 6 to 8 inches and prevent it from going to seed (which weakens the vegetative growth).
Year 3+. Perennial white clover stands typically last 3 to 5 years before they thin out and need overseeding or replanting. Frost seed into the existing stand in late February to thicken thin spots. If the stand has declined below 50 percent clover coverage, it's time for a full reset: spray out the existing vegetation, re-prep the seedbed, and replant. Red clover is shorter-lived (2 to 3 years) and will need overseeding sooner than white clover varieties.
Maintenance That Keeps the Plot Productive
Mowing. Mow 2 to 3 times per growing season. Cut to 4 to 6 inches. Mowing controls broadleaf and grass weeds that try to invade the stand, stimulates fresh vegetative growth that deer prefer over mature stems, and prevents the clover from going to seed prematurely. Time your last mow of the season by mid-September so the clover has time to recover before frost.
Weed management. Grass invasion is the most common problem in clover plots. Clethodim (Select, Arrow) is a grass-specific herbicide that kills grasses without harming clover. Apply when grass weeds are 4 to 6 inches tall. For broadleaf weed invasion, mowing is your primary tool. Do not spray 2,4-D on a clover plot. It will kill the clover along with the broadleaf weeds.
Fertilization. Top-dress with 0-20-20 or a similar phosphorus-potassium blend at 150 to 200 pounds per acre each spring. Clover fixes its own nitrogen, so adding nitrogen fertilizer is a waste of money and encourages grass competition. Soil test every 2 to 3 years to monitor pH drift and nutrient levels.
Overseeding. Frost seed thin spots in late February at 2-3 pounds per acre. This extends the life of the stand without a full replant. If the stand falls below 50 percent clover coverage, a full reset is more effective than overseeding into a weed-dominated plot.
The Five Mistakes That Kill Clover Plots
1. Planting without a soil test
Clover needs a pH of 6.0 to 7.0. If your pH is 5.2, no amount of good seed and perfect timing will produce a strong stand. The $15 soil test saves you $200 in wasted seed and effort. Test first. Always.
2. Planting too deep
Clover seed is tiny. A quarter inch is the maximum seeding depth. Most failed clover plots are buried under an inch of loose soil because someone tilled right before seeding and didn't cultipack. Press the seed into the surface. Don't bury it.
3. Skipping the inoculant
Without rhizobium bacteria in the root zone, clover grows thin, pale, and never fixes nitrogen. Pre-inoculated seed helps. Adding fresh inoculant at planting guarantees the bacteria are present and viable. It costs a few dollars per acre and makes the difference between a plot that thrives and one that lingers.
4. Letting grass take over
Grass is the number one killer of clover food plots. Once grass gets established in a clover stand, it outcompetes the clover for sunlight and nutrients. Mow regularly and spray a grass-selective herbicide (clethodim) at the first sign of grass invasion. Waiting until the grass is knee-high makes the problem ten times harder to fix.
5. Planting in too much shade
Clover tolerates partial shade better than brassicas, but it still needs 4 to 6 hours of direct sun. A plot under a full canopy of mature hardwoods will produce a thin, leggy stand that never fills in. If your only available ground is heavily shaded, consider a shade-tolerant forb blend instead.

How Clover Fits the Bigger Picture
On a property with a complete habitat plan, clover isn't the destination. It's the foundation. Your bedding cover (switchgrass, hinge cuts, native grass) gives deer security. Your fall food plots (brassicas, cereal grains, standing corn) give deer calories through the hunting season. Your clover gives deer high-protein forage through the growing season when fawning does, and antler-growing bucks need it most, and it builds the soil fertility that makes everything else grow better.
The ideal placement for a clover plot is as a staging area between bedding cover and your fall food plots. Deer leaving bedding in the late afternoon stop at the clover to browse before moving to the evening feeding destination. That staging pattern creates predictable movement through a huntable corridor. A clover plot 40 to 80 yards from your bedding edge, downwind of your stand, is one of the most effective setups in whitetail habitat design.
For a property-level analysis of where clover, bedding, staging, and fall food plots should go relative to each other, Hunting Scout's Habitat Strategist reads your drawn property boundary and prescribes specific plantings at specific anchor points. The Strategist identifies gaps in your bedding-to-food chain and tells you exactly where a staging clover plot closes the loop.
Recommended Products
Whitetail Institute Imperial Whitetail Clover. The benchmark perennial clover blend for food plots. A mix of proprietary white clover varieties bred for palatability and longevity. Plant at 8 pounds per acre. Check current availability at Whitetail Institute or Amazon.
Whitetail Institute Tall Tine Tubers. Not clover, but the perfect companion fall brassica plot to pair with your clover. Plant in late summer adjacent to your established clover for a year-round food plot program. Check current availability at Whitetail Institute.
Vitalize Seed Nitro Boost. A 14-species spring blend that builds soil biology before your clover goes in. If your soil is depleted from a failed season, run Nitro Boost first and follow with clover in the fall or the next spring. This is the reset-first, plant-second approach.
Vitalize CoreMicros. A micronutrient and biological support blend that provides the trace elements (including molybdenum for nitrogen fixation) that clover needs to perform. Broadcast at 20 to 25 pounds per acre over your planted seed and let rain work it in.
Clethodim herbicide (AgriStar, Arrow, or Select brand). Grass-selective herbicide for controlling grass invasion without harming clover. Apply at label rates when the grass is 4 to 6 inches tall. Available at farm supply stores and Amazon.
For property-level habitat planning that goes beyond individual food plots, ScoutFlight Hunting Assessments delivers drone-based property reports that show you terrain, cover, and food-source placement from an aerial perspective that walking the ground alone can't provide.
Want more hands-on food plot guides and habitat management strategies? Subscribe to the LandsToHunt newsletter and get seasonal planting windows, product recommendations, and property management advice delivered to your inbox.
This article recommends specific seed, equipment, and habitat products. Some links are affiliate links, meaning LandsToHunt.com earns a small commission if you buy through them. We only recommend products we run on our own property or on client ground through ScoutFlight Hunting Assessments.