June Trail Camera Audit: How to Optimize Your Network Before the Season That Matters
June is when your trail camera network either starts earning its keep or starts wasting your time and money. The cameras you hung in late winter or early spring have been running for two to four months. Some are producing photos that shape your fall strategy. Some are burning batteries and data on squirrels, raccoons, and empty frames triggered by swaying branches. And some have gone silent entirely, sitting on a dead battery or a full card you forgot about.
Right now, before the velvet bucks start showing up on a regular schedule, is the time to audit the entire network. Evaluate what's working, move what isn't, fix the mechanical issues before heat kills your batteries, and set yourself up to build a hit list from the summer photos that start rolling in over the next 8 weeks.
Step 1: Grade Every Camera Location
Pull up every camera in your network, whether you're running two or twelve, and grade each one on three criteria.
Photo volume. How many photos per day is the camera producing? A camera averaging 5 to 15 deer photos per day at a terrain funnel is earning its spot. A camera averaging 2 photos per day of the same doe and fawn isn't telling you anything useful. And a camera producing 200 photos a day is either pointed at a high-traffic area where the data is too noisy to be actionable, or it's getting hammered by false triggers from wind-blown vegetation.
Photo quality. Are the images giving you information you can act on? A clear photo of a buck at 15 feet with a timestamp, temperature, and moon phase is worth more than 50 blurry photos of deer at 60 feet where you can't tell a spike from a doe. If the camera placement produces consistently unclear images because of distance, angle, or backlight, the location is the problem, not the camera.
Intelligence value. Is the camera telling you something you didn't already know? A camera at a water source that confirms deer drink water isn't giving you an edge. A camera at a creek crossing that shows you three different bucks entering from the east between 7:15 and 7:45 PM is giving you a hunt plan. Grade your cameras by whether the photos change your decisions, not just whether they show deer.
After grading, every camera falls into one of three buckets: keep it where it is, move it to a better spot, or pull it entirely. Don't keep a camera running out of laziness. Every camera in your network should justify its battery cost and data plan cost with information that makes your fall hunt better.
Step 2: Move the Underperformers
A camera that isn't producing useful data by June won't start producing in August. Deer patterns will shift as food sources change, but a bad location is a bad location regardless of the season. Here's where to reposition your underperforming cameras.
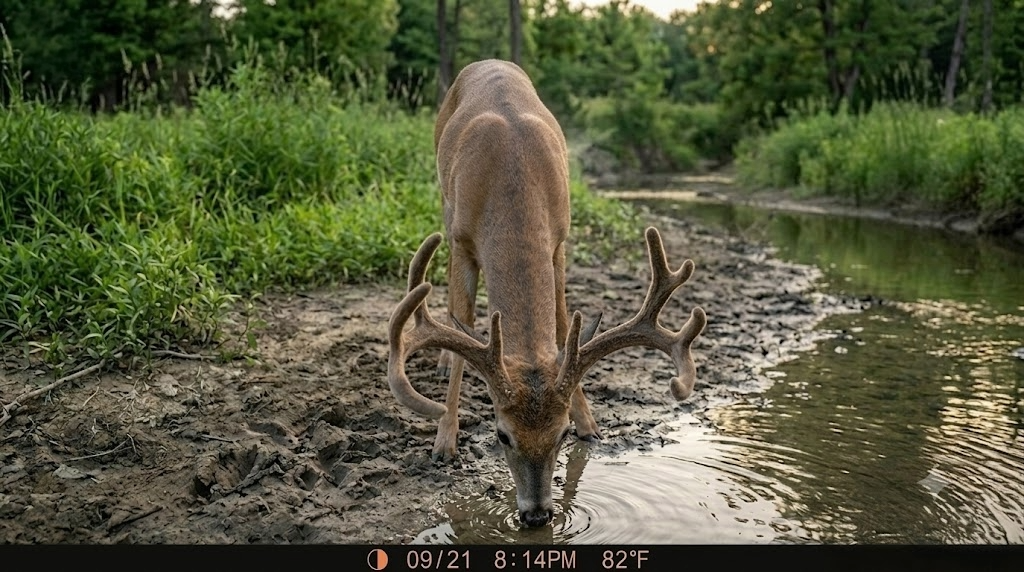
Water sources. June through August is when water concentrates deer movement more than any other single feature. In the Midwest and South, summer heat drives deer to water at least once daily, and in dry years the pattern tightens to a very predictable schedule. Move an underperforming camera to a creek crossing, a pond edge, or a seep where you can see fresh tracks in the mud. Water cameras in summer build your buck inventory faster than any other location.
Mineral sites. If your state allows mineral supplementation (check regulations before placing), a mineral site paired with a cellular camera is one of the most efficient summer scouting tools available. Bucks visit mineral sites regularly from May through August while building antler mass. A camera on an active mineral lick gives you consistent, close-range photos of every buck using the area, with timestamps that tell you when they're moving.
Field edges and food plot transitions. As summer crops and food plots green up, deer shift their feeding patterns to the highest-quality food available. Bean fields, clover plots, and alfalfa draws deer from a wide area in June and July. A camera at the entry point where a trail exits the timber and enters a food source captures deer on a consistent travel route that often holds through early archery season.
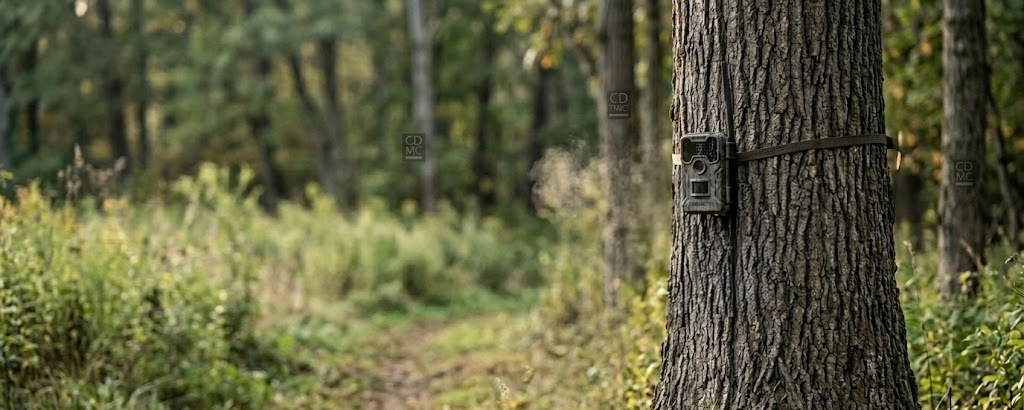
When you move a camera, don't just rehang it and leave. Spend five minutes clearing vegetation from the detection zone, trimming branches that will grow into the frame by August, and verifying the camera angle captures the trail or opening at the right distance (15 to 25 feet is ideal for identification-quality photos).
Step 3: Hot-Weather Battery Management
Heat kills trail camera batteries faster than cold does, and most hunters don't think about it until a camera goes dark in July. High temperatures accelerate the chemical discharge in alkaline batteries, and a camera running in 90-degree heat will burn through a set of AAs 30 to 40 percent faster than the same camera in 50-degree weather.
Three things to do right now:
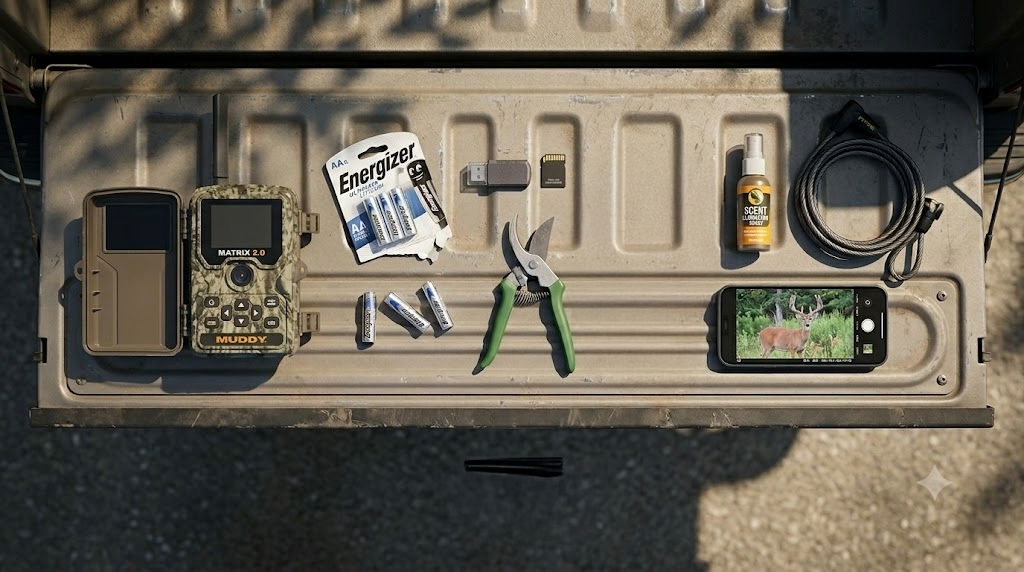
Switch to lithium batteries. Lithium AAs (Energizer Ultimate Lithium) outperform alkaline in heat by a wide margin. They hold voltage more consistently at high temperatures, last two to three times longer per set, and weigh less. The upfront cost per battery is higher, but the per-photo cost is lower because you're not swapping batteries every six weeks through the summer. Every camera in your summer network should be running lithium.
Check batteries now. If you hung cameras in March or April with alkaline batteries, they've been running for 8 to 12 weeks and have already lost a significant portion of their charge. Swap them now before the heat of July and August finishes them off. A dead camera in July means missed velvet photos during the exact window when your hit list takes shape.
Consider an external battery pack on high-value cameras. For cameras at your best locations where you don't want any gaps in coverage, an external battery pack (6V or 12V depending on the camera model) extends run time through the entire summer without a visit. The Muddy Matrix 2.0 supports external power, and the investment keeps your top camera running from June through September on a single connection.
Step 4: Storage and Data Plan Optimization
Summer camera volume runs high. Longer daylight hours, more animal activity (raccoons, possums, squirrels, coyotes, turkey, deer), and vegetation-triggered false captures all push your daily photo count up. That volume hits both your SD card capacity and your cellular data plan.
SD Card Management
If you're running any non-cellular cameras (backup cameras on private land, secondary locations where cellular isn't justified), format or swap your SD cards now. A card that's been accumulating photos since March is approaching capacity on most 32GB cards, and a full card means a dead camera that's still consuming battery but not recording. Carry a spare formatted card on every camera visit and swap rather than deleting in the field.
Cellular Data Plan Optimization
Cellular cameras send every triggered photo over the network, and your monthly data cost scales with volume. In summer, false triggers from wind-blown grass, heat shimmer, and non-target animals can triple your daily photo count compared to fall. Three adjustments bring the cost down without sacrificing useful data:
Reduce sensitivity. Most cellular cameras have a detection sensitivity setting (high, medium, low). Drop to medium or low for summer. You'll miss some distant triggers, but you'll cut false captures dramatically. The deer walking at 15 feet in front of the camera will still trigger on any setting.
Increase the delay between photos. Set the trigger delay to 30 to 60 seconds between captures. In summer, a doe and fawn browsing in front of your camera for 10 minutes don't need 40 photos. They need 3. The delay eliminates the redundant shots that eat your data plan.
Clear the detection zone. Walk to each cellular camera (wearing rubber gloves, on a route you won't use during hunting season) and trim every branch, weed, and grass stem that's grown into the detection zone since you hung the camera. Vegetation in the detection zone is the single biggest driver of false triggers. Ten minutes of trimming saves you dollars in data every month.
Review your plan tier. Most cellular camera services (Muddy, Tactacam, Spartan, Moultrie) offer tiered monthly plans based on photo count. If you're consistently hitting your plan ceiling and paying overage fees, step up one tier for the summer months. If you're well under your cap, drop a tier and save the difference. Check your usage in the app once a month and adjust.
Step 5: Start Building Your Hit List
This is the real payoff of a June camera audit. From mid-June through early August, velvet bucks start showing up on a regular schedule. By late July, antler growth is 80 to 90 percent complete, and you can identify individual bucks, estimate age class, and start building the list of deer you want to hunt in the fall.
Here's how to turn summer trail camera photos into an actionable hit list.
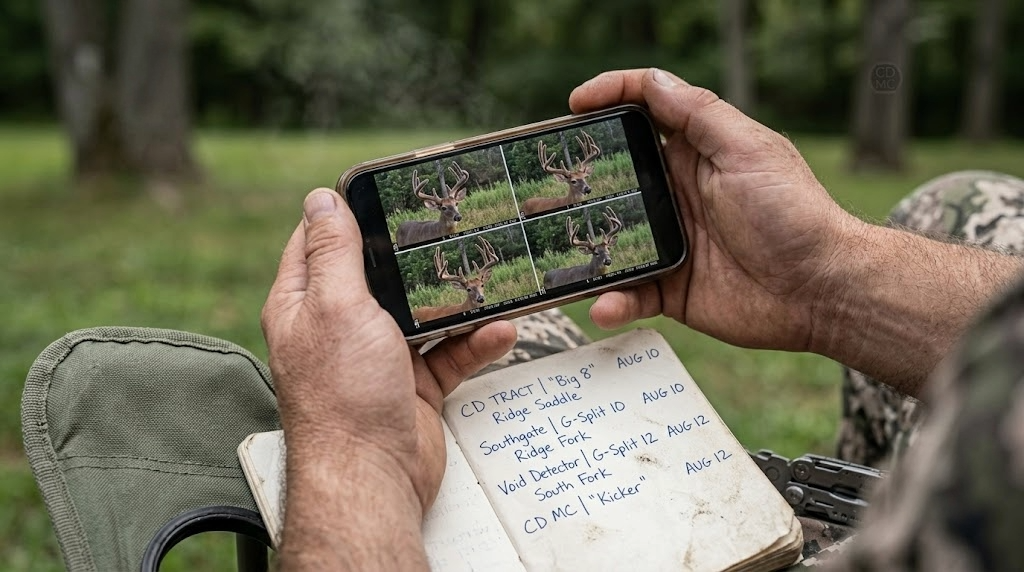
Identify individuals. Every buck has unique antler characteristics, even in velvet. Main beam length, tine placement, tine count, brow tine shape, and overall frame width are all readable from good summer photos. Give each identifiable buck a name or number and start a log. Note the camera location, date, time, and direction of travel for every photo.
Pattern the timing. Summer bucks on food sources are predictable. A buck that shows up at a bean field edge at 7:30 PM on three consecutive photos in July will likely show up at the same time in the same area when archery opens in September or October, as long as the food source is still available. The exact tree he enters from and the exact time he arrives are your hunt plan.
Age the deer. Summer photos give you a better aging window than fall photos because you can see body condition without the visual distortion of winter coat and rut-swollen neck. Look at body depth (front-to-back thickness of the chest), belly sag, back sway, and overall muscle definition. A 2.5-year-old buck looks lean and athletic. A 4.5-year-old buck looks heavy, thick-chested, with a visible pot belly and a back that starts to sway. If you're not confident aging on the hoof, search for the Kroll deer aging guide and compare your photos against the reference images.
Track summer range. If you're running multiple cameras across a property or a cluster of properties, you'll start getting the same buck on different cameras. Map those hits. The distance and direction between camera locations where the same buck appears tells you his summer range and preferred travel routes. That range will compress as food sources shift in fall, but the core area, the spot where he appears most frequently, is where he lives. That's where you hunt him. [TODO LINK: e-scouting for deer hunting -> /field-notes/e-scouting-for-deer-hunting]
Don't fall in love with one buck. Build a list, not a target. Summer bucks shift home ranges when bachelor groups break up in September. A buck that lives on your property in July can move a mile or more by October. Your hit list should include 3 to 5 bucks you'd shoot, ranked by age class and antler quality. If your number-one buck disappears in September, you're not starting from zero. You're hunting number two.
Step 6: Plan Your Fall Network Now
June is also the right time to plan where your cameras will go in August and September when summer patterns transition to fall patterns. The cameras you're running on water and mineral sites right now won't be in the right locations for archery season. Food sources shift. Travel corridors change. Bedding cover thickens.
Use your summer hit list and range data to identify where you'll move cameras in late August:
Transition trails. The trails connecting summer food (bean fields, clover) to fall food (acorns, brassicas, standing corn) are where your cameras belong in September. Identify those trails now while you can still see them, and pin the locations for August repositioning.
Scrape locations. If you hunted the property last fall, you know where the scrapes were. Mark those locations now. A camera on an active scrape in late October is one of the highest-value trail camera placements in all of deer hunting. Pre-plan the camera position and the tree you'll mount to so the August move takes 5 minutes instead of 30.
Terrain funnels for the rut. Saddles, creek crossings, pinch points, and bench trails are where cruising bucks travel during the rut. Place cameras on these features in late September and leave them through November. Your summer water-source cameras are not in these locations. Plan the transition now so you're not scrambling in October.
For property-level analysis of where terrain funnels, travel corridors, and food-source transitions line up on your ground, Hunting Scout builds interactive scouting reports from real USGS and NOAA data. The automated funnel detection shows you where to position fall cameras before you walk the property, and the daily stand picks feature tells you which of your camera locations also doubles as a high-value stand site. Three free reports per month, no credit card required.
The June Checklist
Do all of this before the end of the month:
Grade every camera: keep, move, or pull
Move underperformers to water, mineral, or food-source locations
Swap alkaline batteries for lithium on every camera
Trim vegetation from every detection zone
Reduce sensitivity and increase trigger delay on cellular cameras for summer
Review and adjust your cellular data plan tier
Format or swap SD cards on non-cellular cameras
Start a hit list log with buck ID, location, date, time, and direction of travel
Pin fall camera locations (scrapes, funnels, transition trails) for August repositioning
Every hour you spend on camera maintenance and optimization in June saves you five hours of guessing in October. The hit list you build from summer photos is the foundation of your fall hunt plan. The cameras wasting battery and data right now are the ones that should be earning their keep somewhere else on the property.
Get the network right now. The velvet photos start rolling in this month, and you want every camera in the right place when they do.
For properties where you want a professional look at terrain, cover, and how camera locations connect to stand sites and travel corridors, ScoutFlight Hunting Assessments delivers drone-based property reports that show you the full picture from above.
Want more seasonal strategy content and trail camera tactics? Subscribe to the LandsToHunt newsletter below and get free hunting guides, gear picks, and land management advice delivered to your inbox.
This article contains affiliate links. LandsToHunt.com earns a small commission on qualifying purchases at no extra cost to you.